There are many different ways to use Git & GitHub in a project, depending on the needs and structure of the project. And Git has a lot of advanced features that are valuable and important when you become a more advanced programmer. But when you’re starting out, it can all get a bit overwhelming. Here’s a potential workflow for using Git with GitHub in simple, usable ways for beginners.
- Create a remote repository
- Create a local repository
- Connect the local repository to the remote repository
- Write code!
- Add and commit changes periodically
- Optional: Pull down any changes by others
- Push your changes to the remote repository
- Repeat steps 5-7 as needed
1. Create a remote repository
Log in to GitHub, go to the top right corner, and click the + button. Then select New repository.
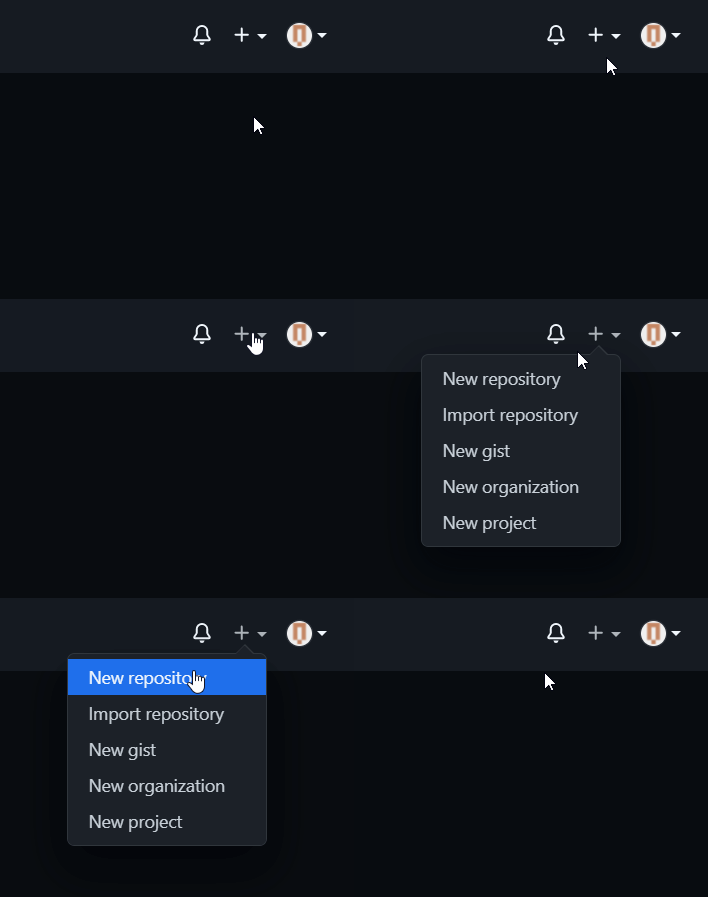
Give your repository a name, select Public or Private, and click the Create repository button.
2. Create a local repository
Go to the folder that you want to become a repository and open Git Bash pointed to that folder. You can do that in File Explorer:
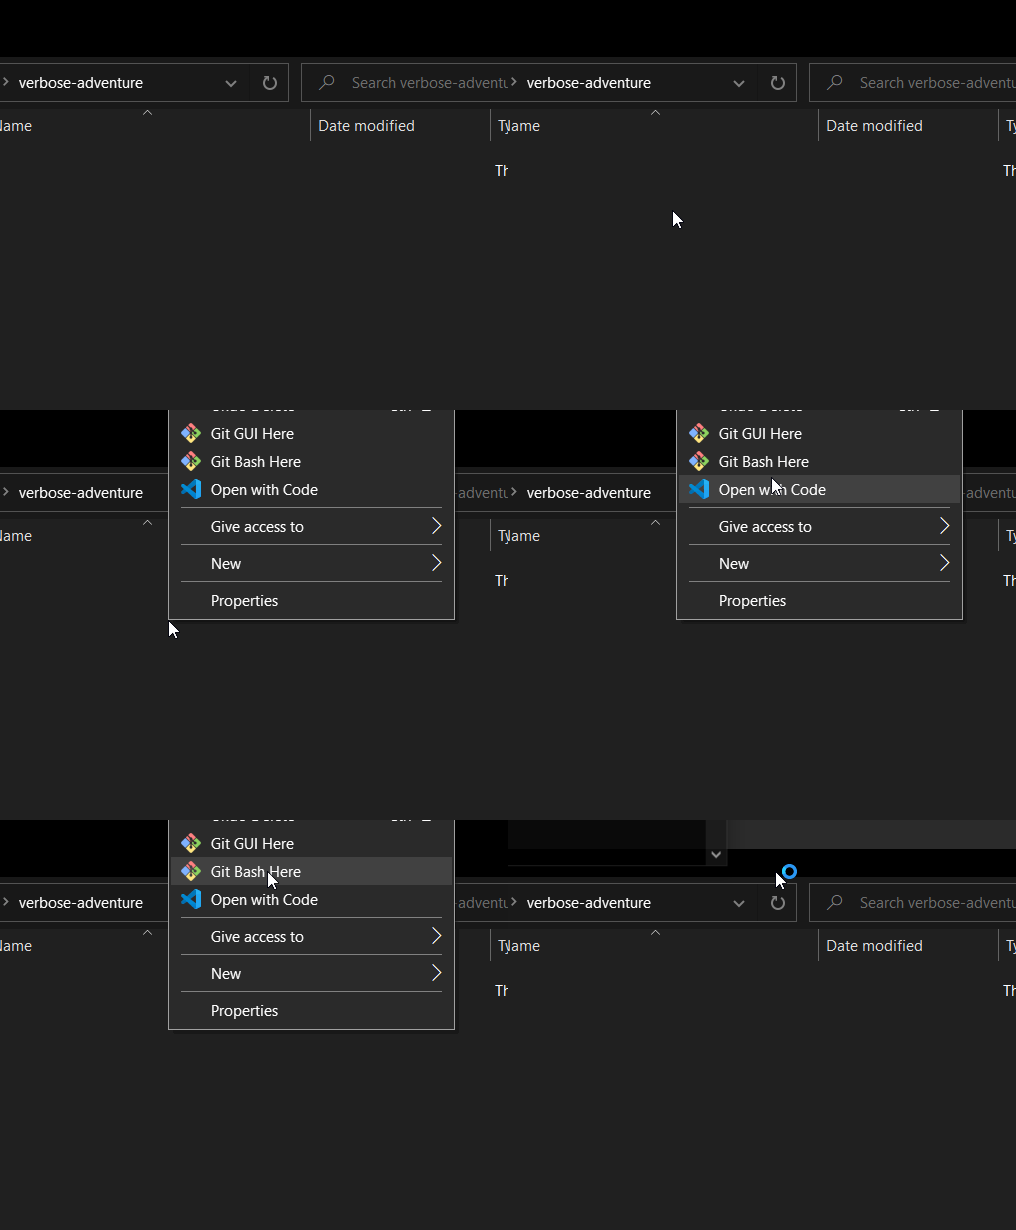
Or by opening the folder in Visual Studio Code and opening a Git Bash terminal.
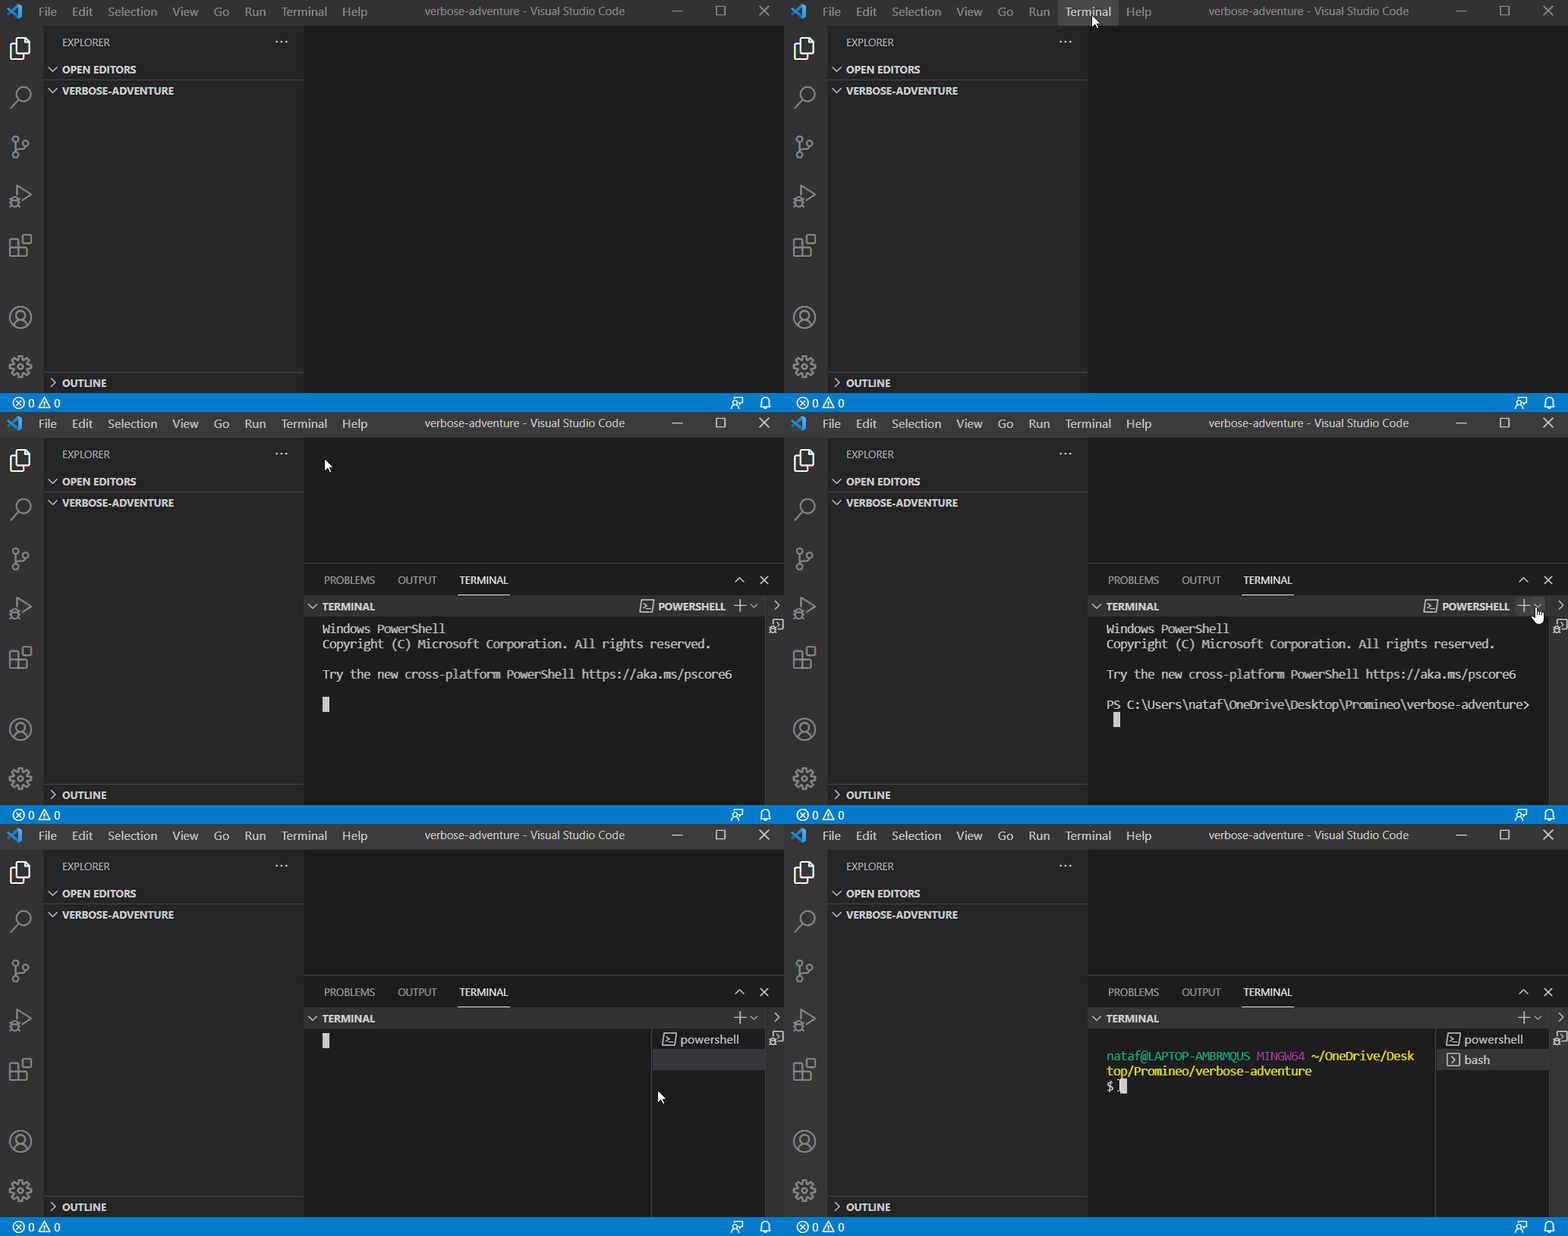
Once you have Git Bash open in the correct folder, you can create a local repository there by running:
git initNow you have a local repository in that folder. You can check that it’s working by running:
git statusYou should get a message similar to this:
On branch master

No commits yet

nothing to commit (create/copy files and use
"git add" to track)
3. Connect the local repository to the remote repository
First we’ll make sure our local and remote repository are using the same name for the default branch:
git branch -M mainThen we’ll tell our local repository what remote repository we want it to connect to. You’ll need the URL for your remote repository.
Getting your remote repository URL
To get your repository URL, go to your repository on GitHub.
You may see a Code button. Click the Code button and copy the HTTPS URL.
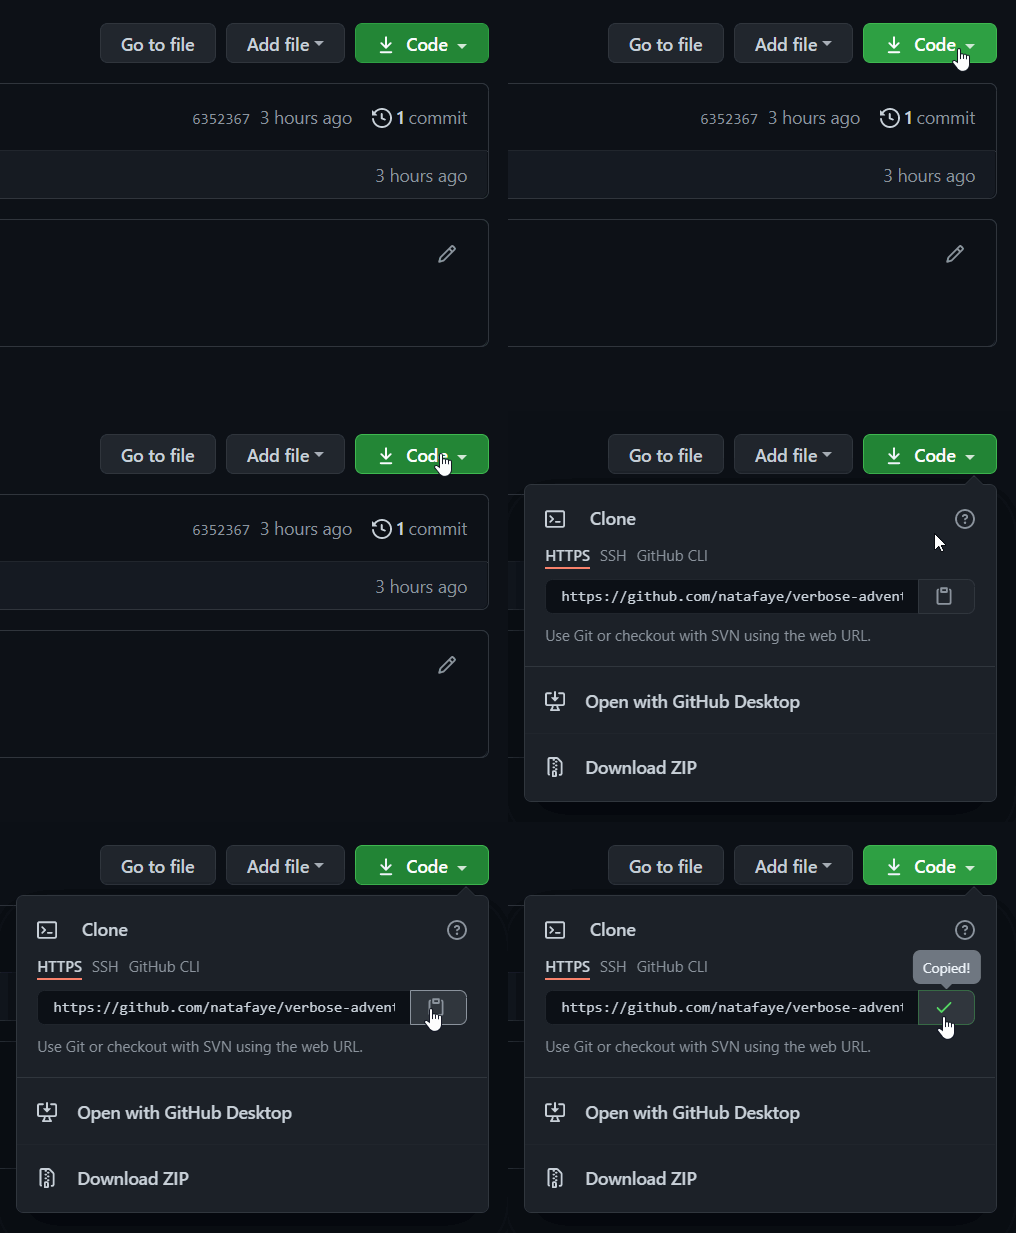
Or you may see a Quick Setup section where you can copy the HTTPS URL.

Once you have your remote repository URL, we can tell our local repository:
git remote add origin <your-repository-url>So for the repository in the examples above, I would run the command like this:
git remote https://github.com/natafaye/verbose-adventure.git4. Write code!
At this point you’re ready to write code. Any files or folders you create and any code you write in those files and folders will be tracked by Git, but it won’t yet show up on the remote repository.
5. Add and commit changes periodically
Whenever you get a piece of code working or finish part of something, you’ll want to add and commit your changes. This creates a version snapshot and saves your code at that point with Git. Committed changes are ready to be pushed to the online repository. Also if something goes wrong later, you can go back to the snapshot.
git add .
git commit -m "Description of what you did"
6. Optional: Pull down any changes by others
If you’re working on an online repository that others are also working on, you’re going to want to pull down their changes every so often. Make sure your changes are added and committed first, then run:
git pull origin mainIf you’ve pushed before with the -u flag, you should be able to just run:
git pullMerge Conflict
If someone else edited the same lines of code you did, you might get a merge conflict.
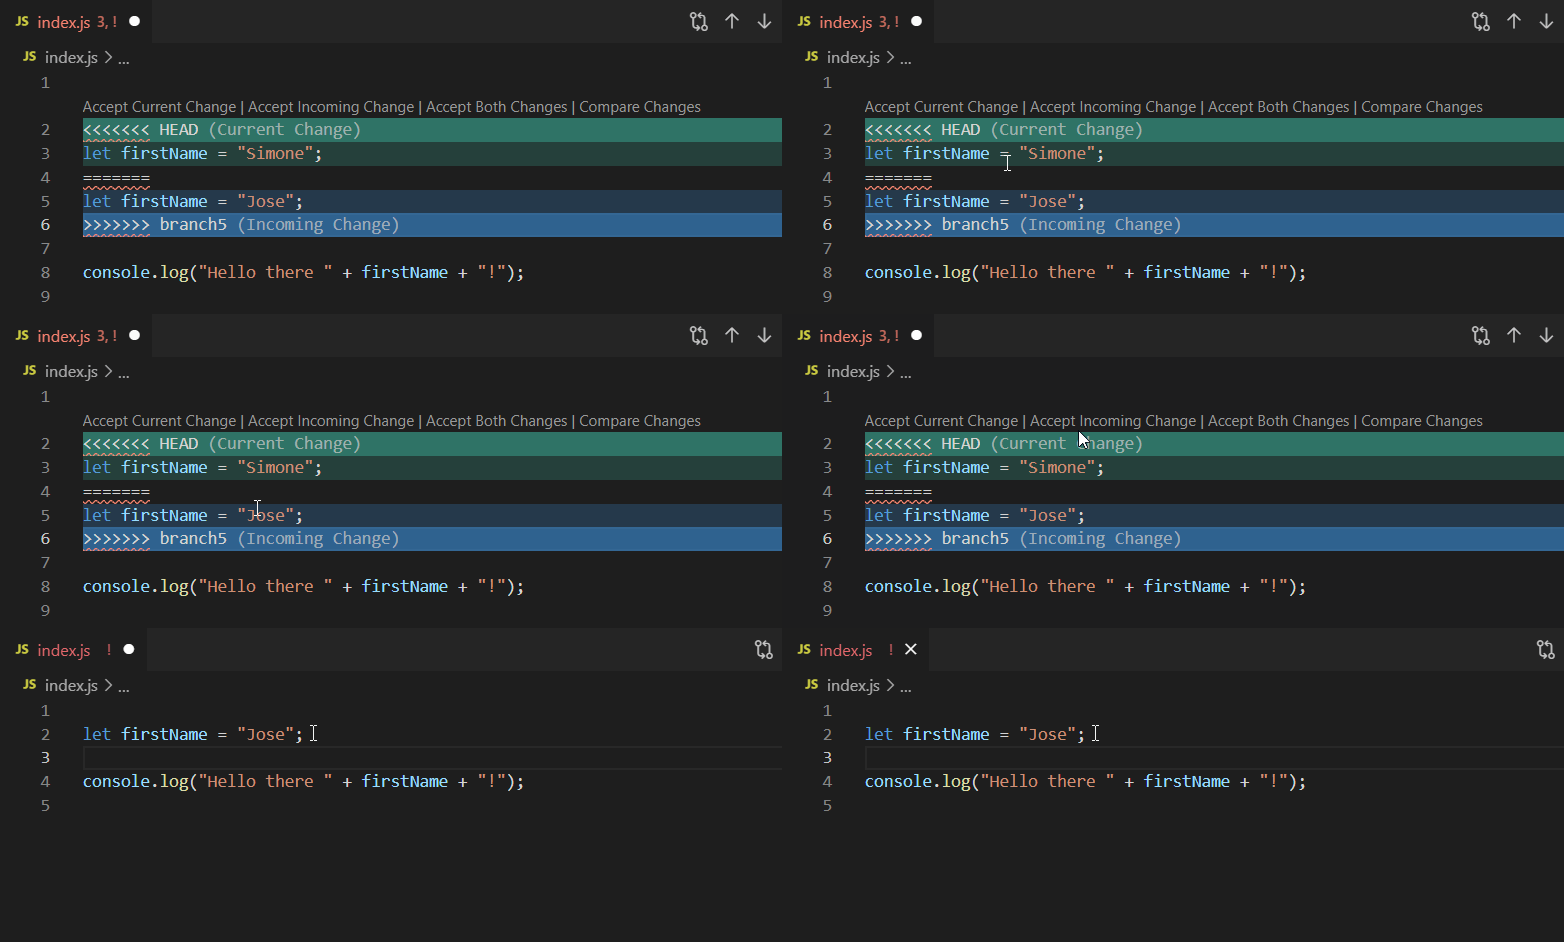
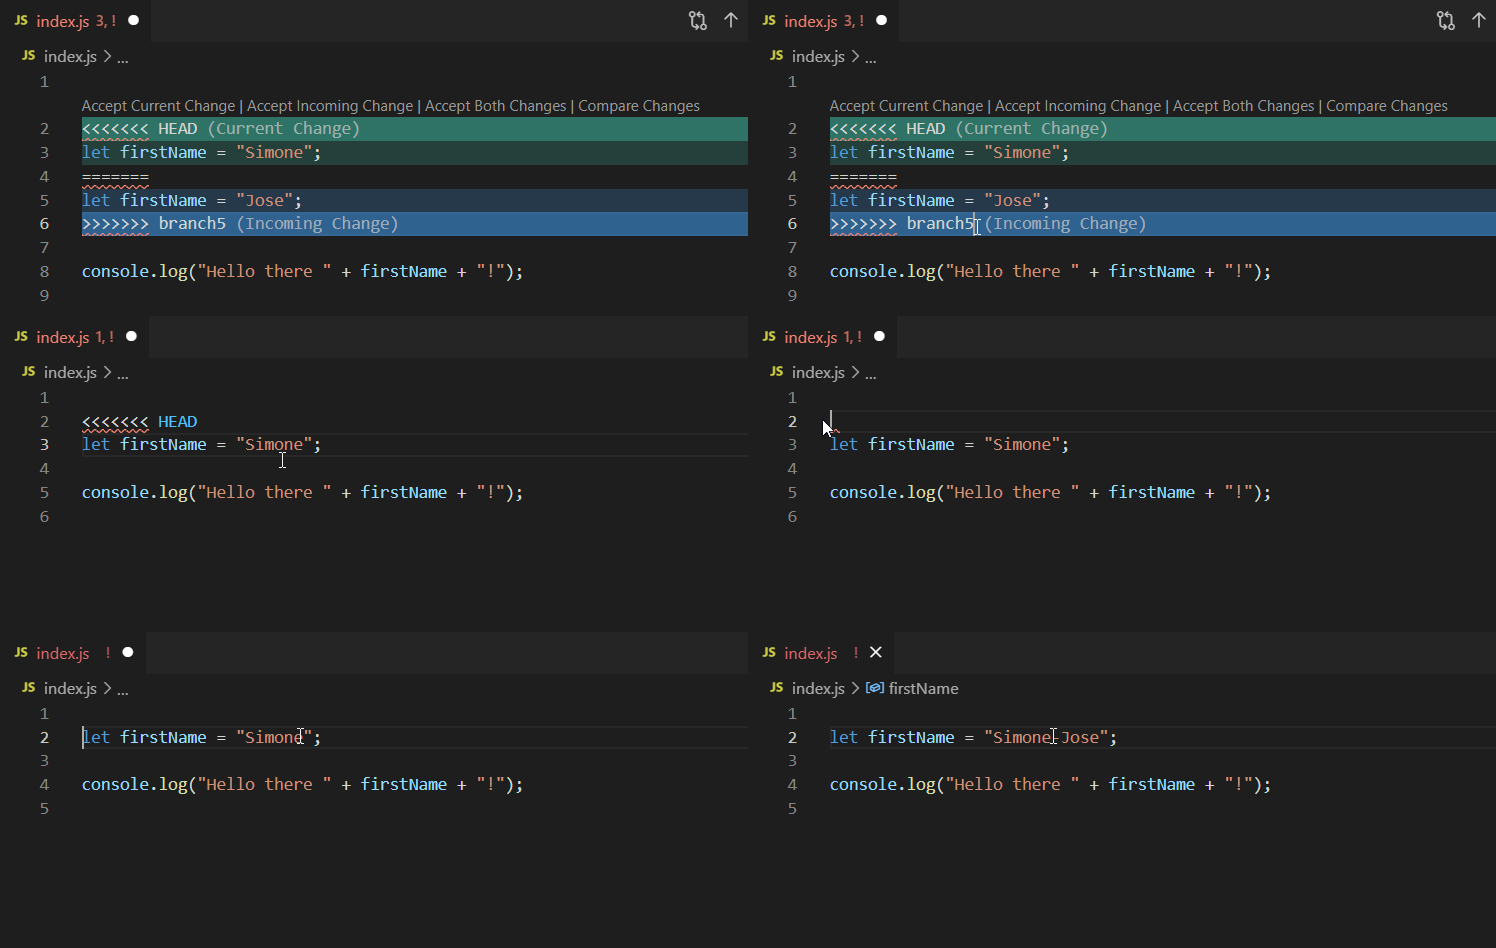
To resolve the merge conflict, open any files that had merge conflicts and edit the file until it is merged how you would like.
You can use Visual Studio Code’s helper buttons:
Or just edit the file directly:
Then add and commit your merge fix:
git add .
git commit -m "Fixed merge conflict with first name"
7. Push your changes to the remote repository
If you are working on a repository with others, make sure you pull their changes down and merge them into yours before you push your changes up.
If this is the first time you’ve pushed, run:
git push -u origin mainThe -u flag tells git that you want to push and pull to and from origin main going forward. The next time you push you can just run:
git push8. Repeat steps 5-7 as needed
Every time you get a piece working, add and commit your changes (step 5). When you’ve finished and are ready to send your code to the remote repository, pull and push (step 6 and step 7).
So if we bring that all together, after finishing your changes you can run:
git add .
git commit -m "Description of your changes"
git pull
git push
And your code will be up to date on your computer (the local repository) and on Github (the remote repository).